~ 11 min read
Unlocking the Power of OpenAI's ChatGPT API: A Guide for Next.js Developers
Artificial intelligence has become a driving force in the technology industry, enabling machines to learn and perform tasks that were previously thought to be exclusive to human beings. OpenAI, a leading AI research organization, has been at the forefront of this revolution, developing powerful models that can process natural language and generate human-like text. One of these models is the ChatGPT API, which can generate coherent and contextually relevant responses to text inputs.
For developers using Next.js, a popular React framework for building web applications, integrating the ChatGPT API can unlock new possibilities for conversational AI. In this guide, we'll explore the power of the ChatGPT API and show you how to use it with Next.js to build smarter and more engaging chatbots. Whether you're an experienced developer or just getting started with Next.js, this guide will provide you with the knowledge and tools you need to take your conversational AI to the next level. So let's get started and unlock the full potential of the ChatGPT API by building a full web app with ChatGPT's API integration from start to finish.
Retrieve OpenAI API Key
In order to be able to make use of OpenAI's API from within our Next.js application we need to retrieve an API key first from the OpenAI dashboard.
To retrieve your OpenAI API key you need to create a user account at https://openai.com/ and access the API Keys section in the OpenAI dashboard to create a new API key.
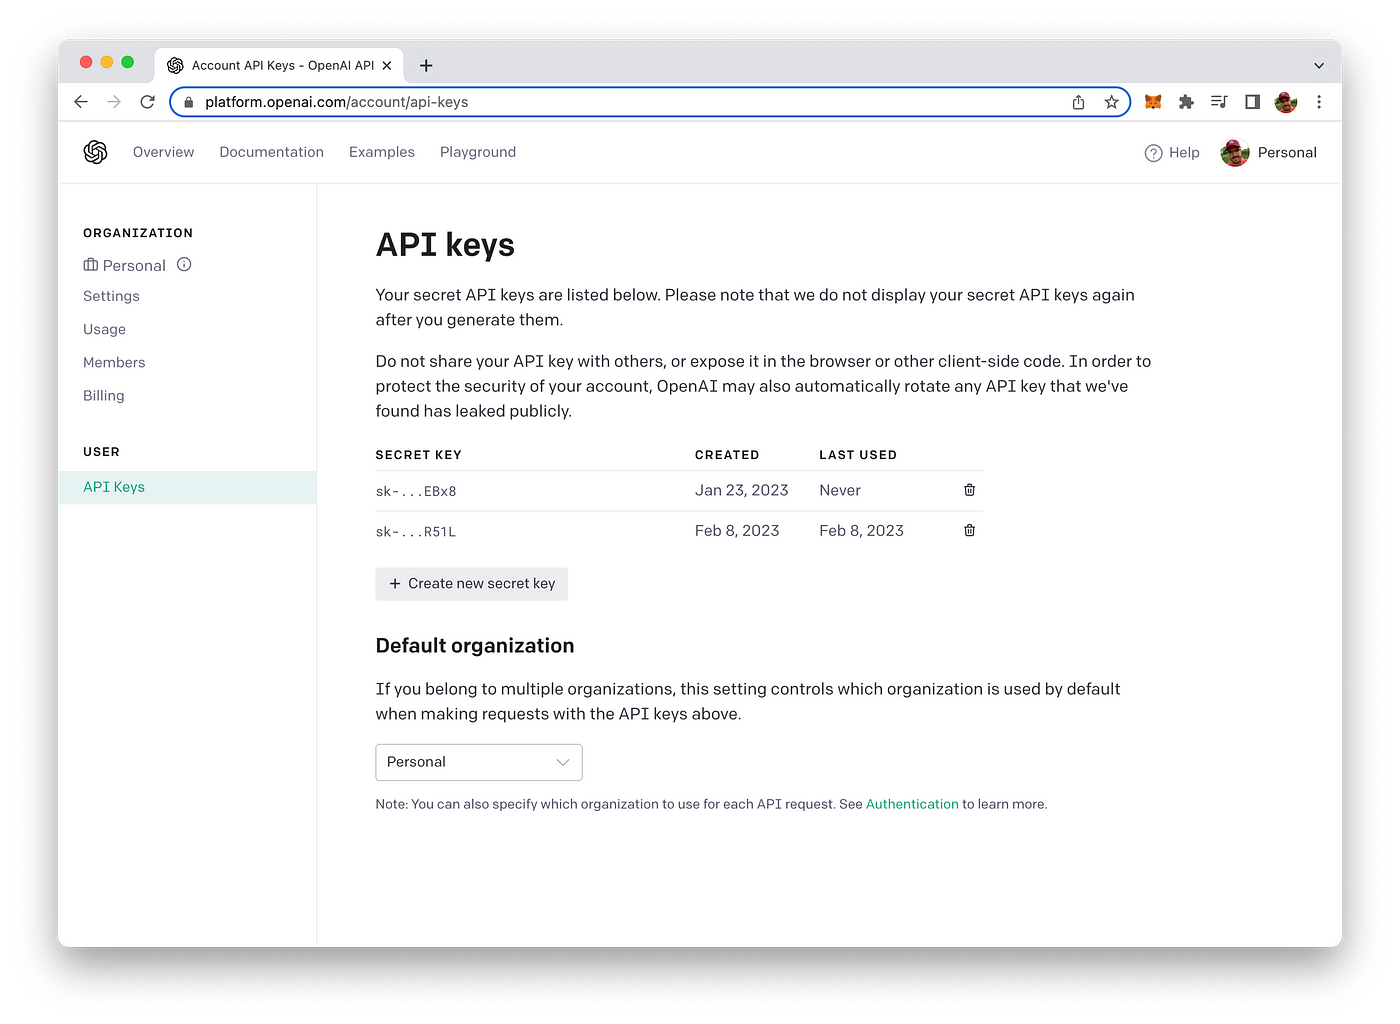
This key is secret and must not shared with anybody else. We'll need to use this key later of when implementing the Python script to access OpenAI`s API.
Setting Up The Next.js 13 Project
Next, we need to create a new Next.js 13 project to get started with the implementation. Use the following command:
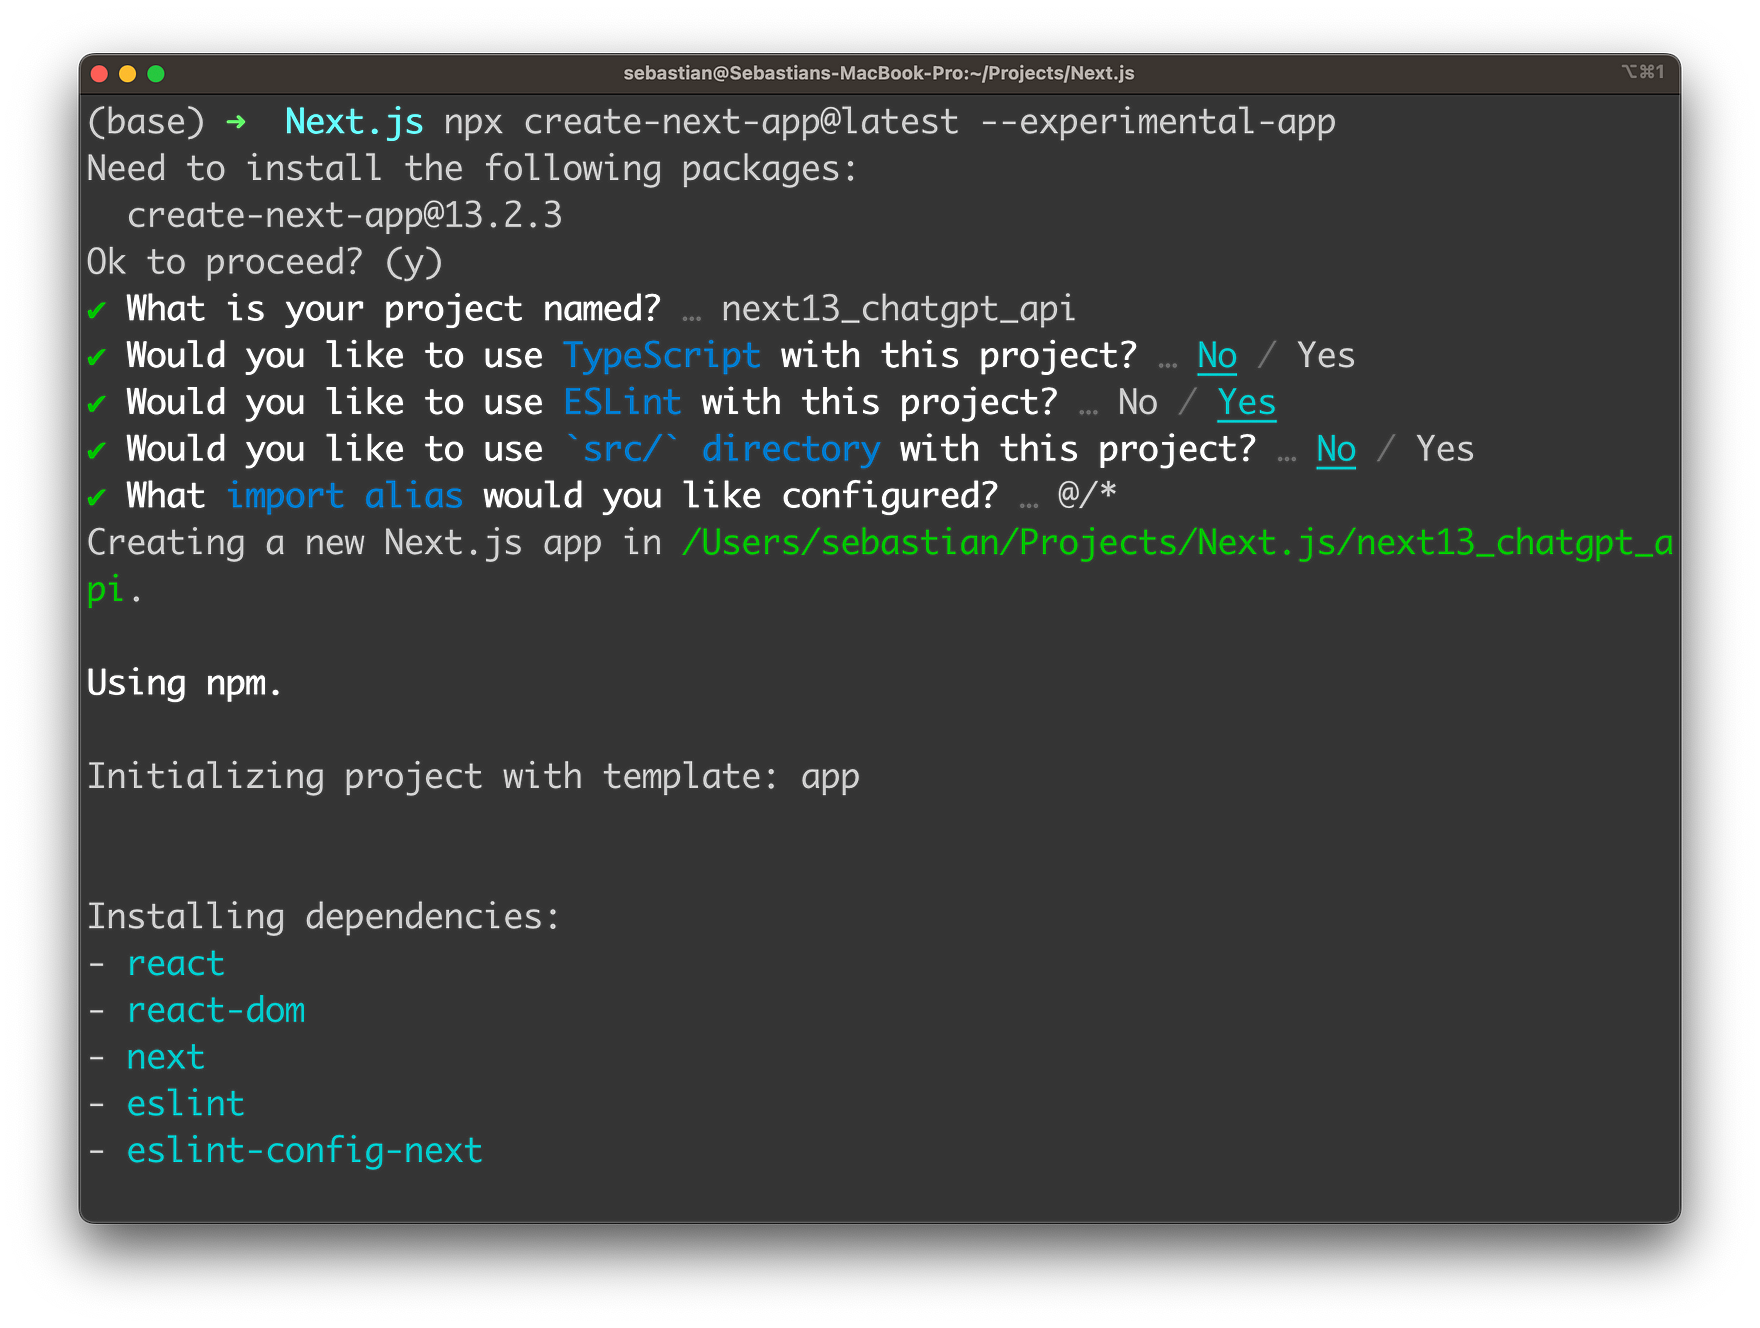
$ npx create-next-app@latest --experimental-appThe experimental-app flag specifies that we want to use the new app folder structure in our Next.js project.
In order to complete the creation process of the project you need to answer a few questions on the command line:
Finally, you can change into the newly created project folder by entering:
$ cd next13_chatgpt_apiAs we want to use Chakra UI for the user interface of our web application we need to install some more dependencies:
$ npm i @chakra-ui/react @emotion/react @emotion/styled framer-motion @chakra-ui/next-jsOnce the Chakra UI dependencies have been installed successfully we need to activate the use of Chakra UI in our application by opening file app/layout.js and embed the application's pages into CacheProvider and ChakraProvider component like you can see in the following listing:
'use client'

import { CacheProvider } from "@chakra-ui/next-js";
import { ChakraProvider } from "@chakra-ui/react";

export default function RootLayout({ children }) {
  return (
    <html lang="en">
      <head />
      <body>
        <CacheProvider>
          <ChakraProvider>{children}</ChakraProvider>
        </CacheProvider>
      </body>
    </html>
  );
}
Implement Route Handler
Next, add a new empty file route.js in the new folder app/api/chat and insert the following code for the API route implementation by using the new Next.js Route Handler standard:
export const runtime = "experimental-edge";

if (!process.env.NEXT_PUBLIC_OPENAI_API_KEY) {
  throw new Error("Missing OpenAI API Key");
}

export async function POST(request) {
  try {
    const { prompt } = await request.json();

    const response = await fetch("https://api.openai.com/v1/chat/completions", {
      method: "POST",
      headers: {
        "Content-Type": "application/json",
        Authorization: `Bearer ${process.env.NEXT_PUBLIC_OPENAI_API_KEY}`,
      },
      body: JSON.stringify({
        model: "gpt-3.5-turbo",
        messages: [{ role: "user", content: prompt }],
        temperature: 0.7,
        top_p: 1,
        frequency_penalty: 0,
        presence_penalty: 0,
        max_tokens: 200,
        stream: false,
        n: 1,
      }),
    });

    const json = await response.json();
    return new Response(json.choices[0].message.content);
  } catch (e) {
    return new Response("Request cannot be processed!", {
      status: 400,
    });
  }
This code defines the Next.js 13 API route /api/chat that responds to HTTP POST requests and is used to access ChatGPT API functionality from our front-end.
The first few lines of the implementation check for the presence of the environment variable NEXT_PUBLIC_OPENAI_API_KEY. If this variable is not set, it throws an error indicating that the OpenAI API key is missing.
If the key is present, the code proceeds to handle the incoming POST request. It expects a JSON object containing a single field prompt, which contains the user's input.
The code then makes a request to the OpenAI ChatGPT API at the https://api.openai.com/v1/chat/completions endpoint, passing in the prompt received from the user. The request is made with the POST method and includes a JSON payload containing various parameters such as the name of the model to use, the temperature, the maximum number of tokens to generate, and so on. The OpenAI API key is also included as an Authorization header.
If the request is successful, the API returns a JSON response containing a field choices, which is an array of possible responses generated by the OpenAI's ChatGPT API. The API returns the first response from the array as plain text.
If there is an error while processing the request, the API returns a 400 status code with a plain text error message indicating that the request cannot be processed.
Implement The Front-End With Chakra UI
In the next step we're ready to move on and implement the front-end part of the Next.js web application by opening up file app/page.js. First, clean up and remove the existing code from that file and start by adding the following implementation of Home component:
'use client'
import { useState } from "react";
import { Heading, Text, Box, Flex, Button, Textarea } from "@chakra-ui/react";

export default function Home() {
  let [prompt, setPrompt] = useState("");
  let [isLoading, setIsLoading] = useState(false);
  let [result, setResult] = useState("");

  return (
    // Insert UI Code Here
  );
}
Home is the main Next.js page component of our web app.
The component imports the useState hook and various UI components from the Chakra UI library.
The export default statement defines a default export for the component. The function body defines three state variables using the useState hook: prompt, isLoading, and result.
-
promptis initially an empty string and is intended to hold the user's input. -
isLoadingis initially false and is intended to keep track of whether the app is currently processing a request. -
resultis initially an empty string and is intended to hold the response from the request made to ChatGPT's API.
In order to implement the UI of our web application add the following JSX code (which is making use of Chakra's UI components) into the return statement:
    <Flex
      width={"100vw"}
      height={"100vh"}
      alignContent={"center"}
      justifyContent={"center"}
      bgGradient="linear(to-b, #005C97, #0083B0)"
    >
      <Box maxW="2xl" m="0 auto" p="20px">
        <Heading
          as="h1"
          textAlign="center"
          fontSize="5xl"
          mt="100px"
          bgGradient="linear(to-l, #C9FFBF, #FFAFBD)"
          bgClip="text"
        >
          Next.js 13 & ChatGPT API
        </Heading>
        <Heading as="h2" textAlign="center" fontSize="3xl" mt="20px">
          Get Started Guide
        </Heading>
        <Text fontSize="xl" textAlign="center" mt="30px">
          This is a Next.js 13 sample web application making use of OpenAI`s
          brand new ChatGPT API to perform text completions. Furthermore it uses
          Next.js 13 app directory together with Route Handlers.
        </Text>
        <Textarea
          value={prompt}
          onChange={handlePromptChange}
          placeholder="Insert your prompt here ..."
          mt="30px"
          size="lg"
        />
        <Button
          isLoading={isLoading}
          loadingText="Loading..."
          colorScheme="teal"
          size="lg"
          mt="30px"
          onClick={handleSubmitPromptBtnClicked}
        >
          Submit Prompt
        </Button>
        <Button
          colorScheme="teal"
          size="lg"
          mt="30px"
          ml="20px"
          onClick={handleClearBtnClicked}
        >
          Clear
        </Button>
        {result != "" && (
          <Box maxW="2xl" m="0 auto">
            <Heading as="h5" textAlign="left" fontSize="lg" mt="40px">
              Result:
            </Heading>
            <Text fontSize="lg" textAlign="left" mt="20px">
              {result}
            </Text>
          </Box>
        )}
      </Box>
    </Flex>
This JSX code defines a UI component using Chakra UI library components.
The component is a Flex container with full viewport width and height, centered content and a background gradient.
Within the Flex container, there is a Box component with a maximum width of 2xl and horizontal margins of 0 auto to center it within the parent container.
Inside the Box, there are Heading, Text, Textarea and Button components that display the following UI elements:
- A large heading displaying the title of the web application
- A smaller heading for the subtitle of the web application
- A text element displaying a description of the application
- A
Textareacomponent for user input - A button for submitting the input
- A button for clearing the input
- A
Boxcomponent that displays the result of the text completion process (only if theresultstate variable is not empty).
The UI code uses various Chakra UI props to control the appearance and layout of the components, including maxW, m, p, mt, bgGradient, bgClip, colorScheme, and size.
Overall, this JSX code defines the UI structure and styling for the Next.js web application that leverages the OpenAI ChatGPT API to perform text completions.
Implement Event Handlers
To further complete the implementation in page.js we need to add the respective event handler functions. Let's start with the following:
const handlePromptChange = (e) => {
    setPrompt(e.target.value);
};
This code defines an event handler function handlePromptChange which is triggered when the user changes the input in the corresponding input field. The function receives an event object as an argument, which represents the user's interaction with the input field.
The function uses the setPrompt function, which is defined using the useState hook, to update the state of the prompt variable with the new value of the input field e.target.value retrieves the current value of the input field and assigns it to the prompt state variable using the setPrompt function.
In summary, whenever the user types into the input field, the handlePromptChange function is called and it sets the prompt state to the value of the input field, causing the component to re-render with the updated prompt state value.
Next, let's add the implementation for event handler function handleClearBtnClicked:
  const handleClearBtnClicked = () => {
    setPrompt("");
    setResult("");
  };
The handleClearBtnClicked function is an event handler that is triggered when the user clicks on a clear button. This function resets the state variables prompt and result to their initial empty string values, effectively clearing any previous input or output data from the UI.
In the function body, the setPrompt("") statement updates the prompt state variable with an empty string, effectively clearing the input field. The setResult("") statement similarly updates the result state variable with an empty string, clearing any previous results that may have been displayed.
Finally, let's add handleSubmitPromptBtnClicked():
    const handleSubmitPromptBtnClicked = () => {
    setIsLoading(true);
    fetch("/api/chat", {
      method: "POST",
      headers: {
        "Content-Type": "application/json",
      },
      body: JSON.stringify({
        prompt: prompt,
      }),
    })
      .then((res) => res.text())
      .then((text) => {
        setResult(text);
        setIsLoading(false);
      });
  };
The above code defines an event handler function handleSubmitPromptBtnClicked() that is called when a submit button is clicked. The function does the following:
- Sets the
isLoadingstate totrueto indicate that a request is being made. - Calls the
fetchfunction to make a POST request to the/api/chatendpoint with a JSON payload that includes the current value ofprompt. - Once the response is received, it is converted to text using the
text()method. - The resulting text is then set as the
resultstate variable. - Finally, the
isLoadingstate is set back tofalseto indicate that the request has been completed.
In the following listing you can see the complete code of Home component again:
'use client'
import { useState } from "react";
import { Heading, Text, Box, Flex, Button, Textarea } from "@chakra-ui/react";

export default function Home() {
  let [prompt, setPrompt] = useState("");
  let [isLoading, setIsLoading] = useState(false);
  let [result, setResult] = useState("");

  const handlePromptChange = (e) => {
    setPrompt(e.target.value);
  };

  const handleSubmitPromptBtnClicked = () => {
    setIsLoading(true);
    fetch("/api/chat", {
      method: "POST",
      headers: {
        "Content-Type": "application/json",
      },
      body: JSON.stringify({
        prompt: prompt,
      }),
    })
      .then((res) => res.text())
      .then((text) => {
        setResult(text);
        setIsLoading(false);
      });
  };

  const handleClearBtnClicked = () => {
    setPrompt("");
    setResult("");
  };

  return (
    <Flex
      width={"100vw"}
      height={"100vh"}
      alignContent={"center"}
      justifyContent={"center"}
      bgGradient="linear(to-b, #005C97, #0083B0)"
    >
      <Box maxW="2xl" m="0 auto" p="20px">
        <Heading
          as="h1"
          textAlign="center"
          fontSize="5xl"
          mt="100px"
          bgGradient="linear(to-l, #C9FFBF, #FFAFBD)"
          bgClip="text"
        >
          Next.js 13 & ChatGPT API
        </Heading>
        <Heading as="h2" textAlign="center" fontSize="3xl" mt="20px">
          Get Started Guide
        </Heading>
        <Text fontSize="xl" textAlign="center" mt="30px">
          This is a Next.js 13 sample web application making use of OpenAI`s
          brand new ChatGPT API to perform text completions. Furthermore it uses
          Next.js 13 app directory together with Route Handlers.
        </Text>
        <Textarea
          value={prompt}
          onChange={handlePromptChange}
          placeholder="Insert your prompt here ..."
          mt="30px"
          size="lg"
        />
        <Button
          isLoading={isLoading}
          loadingText="Loading..."
          colorScheme="teal"
          size="lg"
          mt="30px"
          onClick={handleSubmitPromptBtnClicked}
        >
          Submit Prompt
        </Button>
        <Button
          colorScheme="teal"
          size="lg"
          mt="30px"
          ml="20px"
          onClick={handleClearBtnClicked}
        >
          Clear
        </Button>
        {result != "" && (
          <Box maxW="2xl" m="0 auto">
            <Heading as="h5" textAlign="left" fontSize="lg" mt="40px">
              Result:
            </Heading>
            <Text fontSize="lg" textAlign="left" mt="20px">
              {result}
            </Text>
          </Box>
        )}
      </Box>
    </Flex>
  );
}
Start The Development Web Server
It's time to start the Next.js development web server and check the result by typing in the following command:
$ npm run devThe server is starting up and making our application available on port 3000:
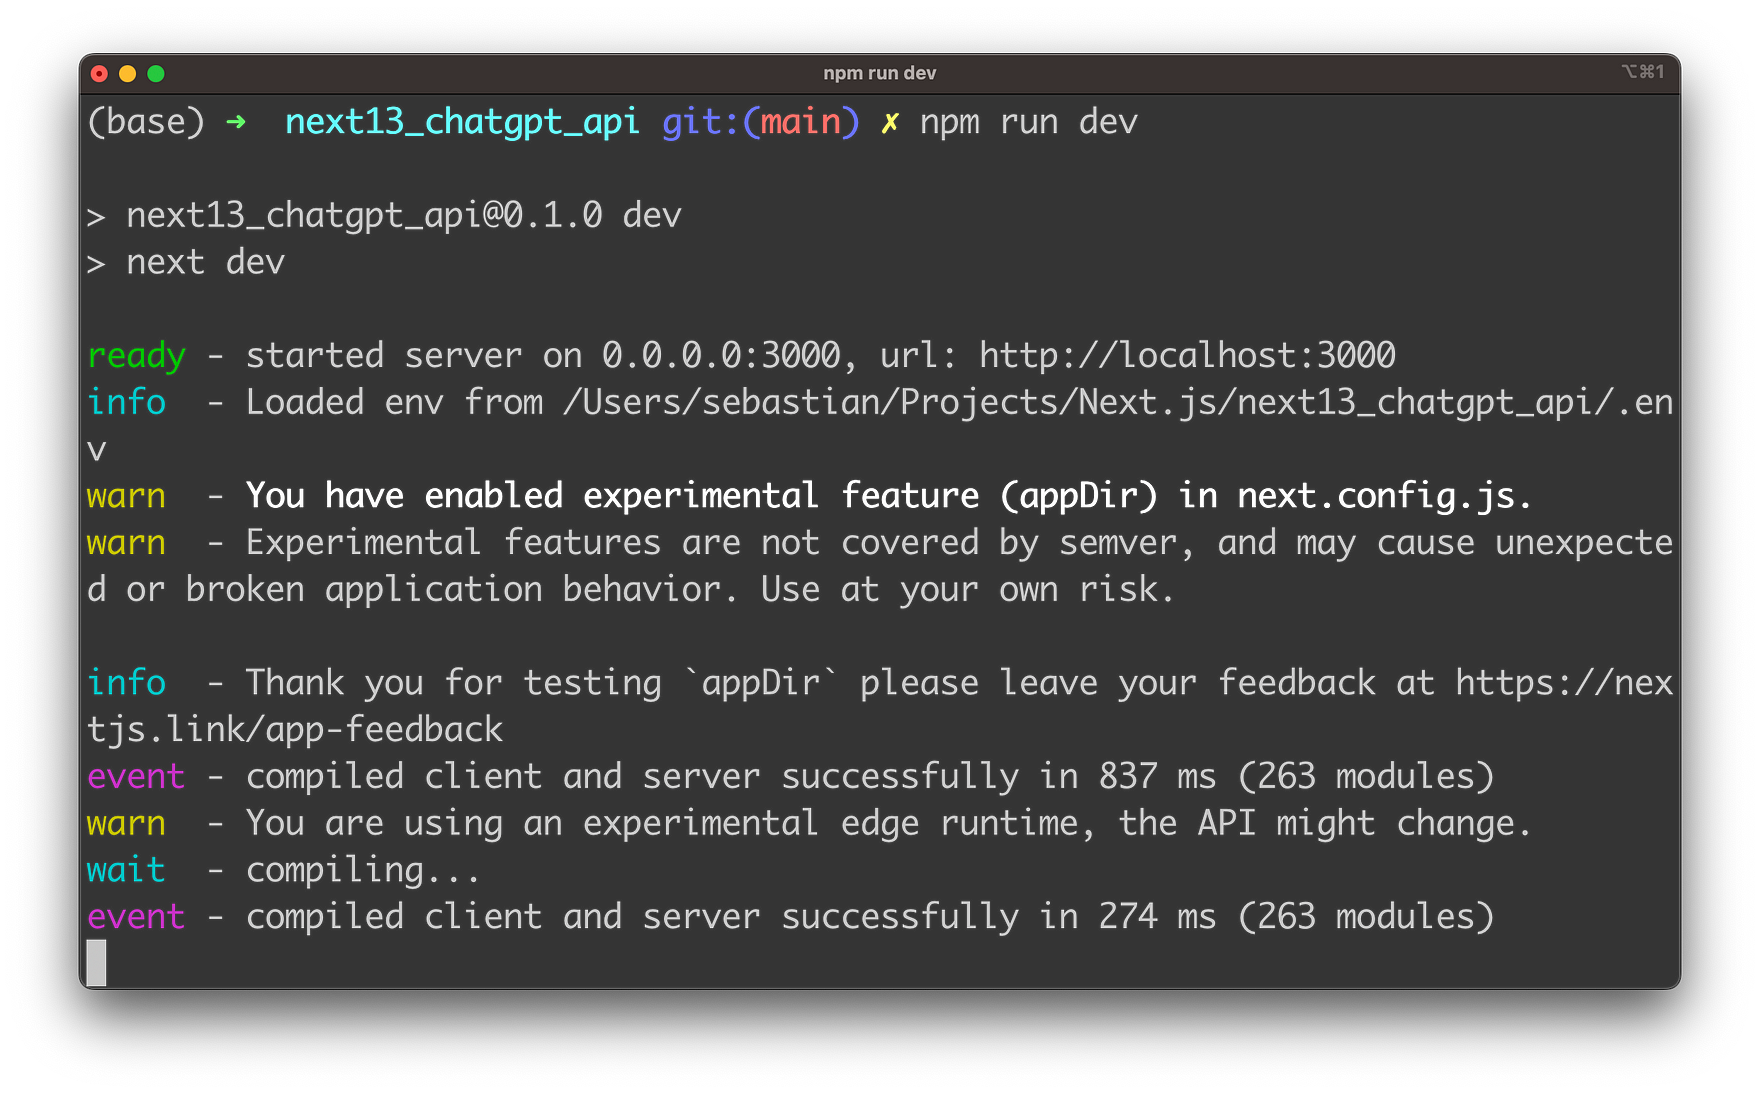
You can now access the application in the browser. The result can be seen in the following screenshot:
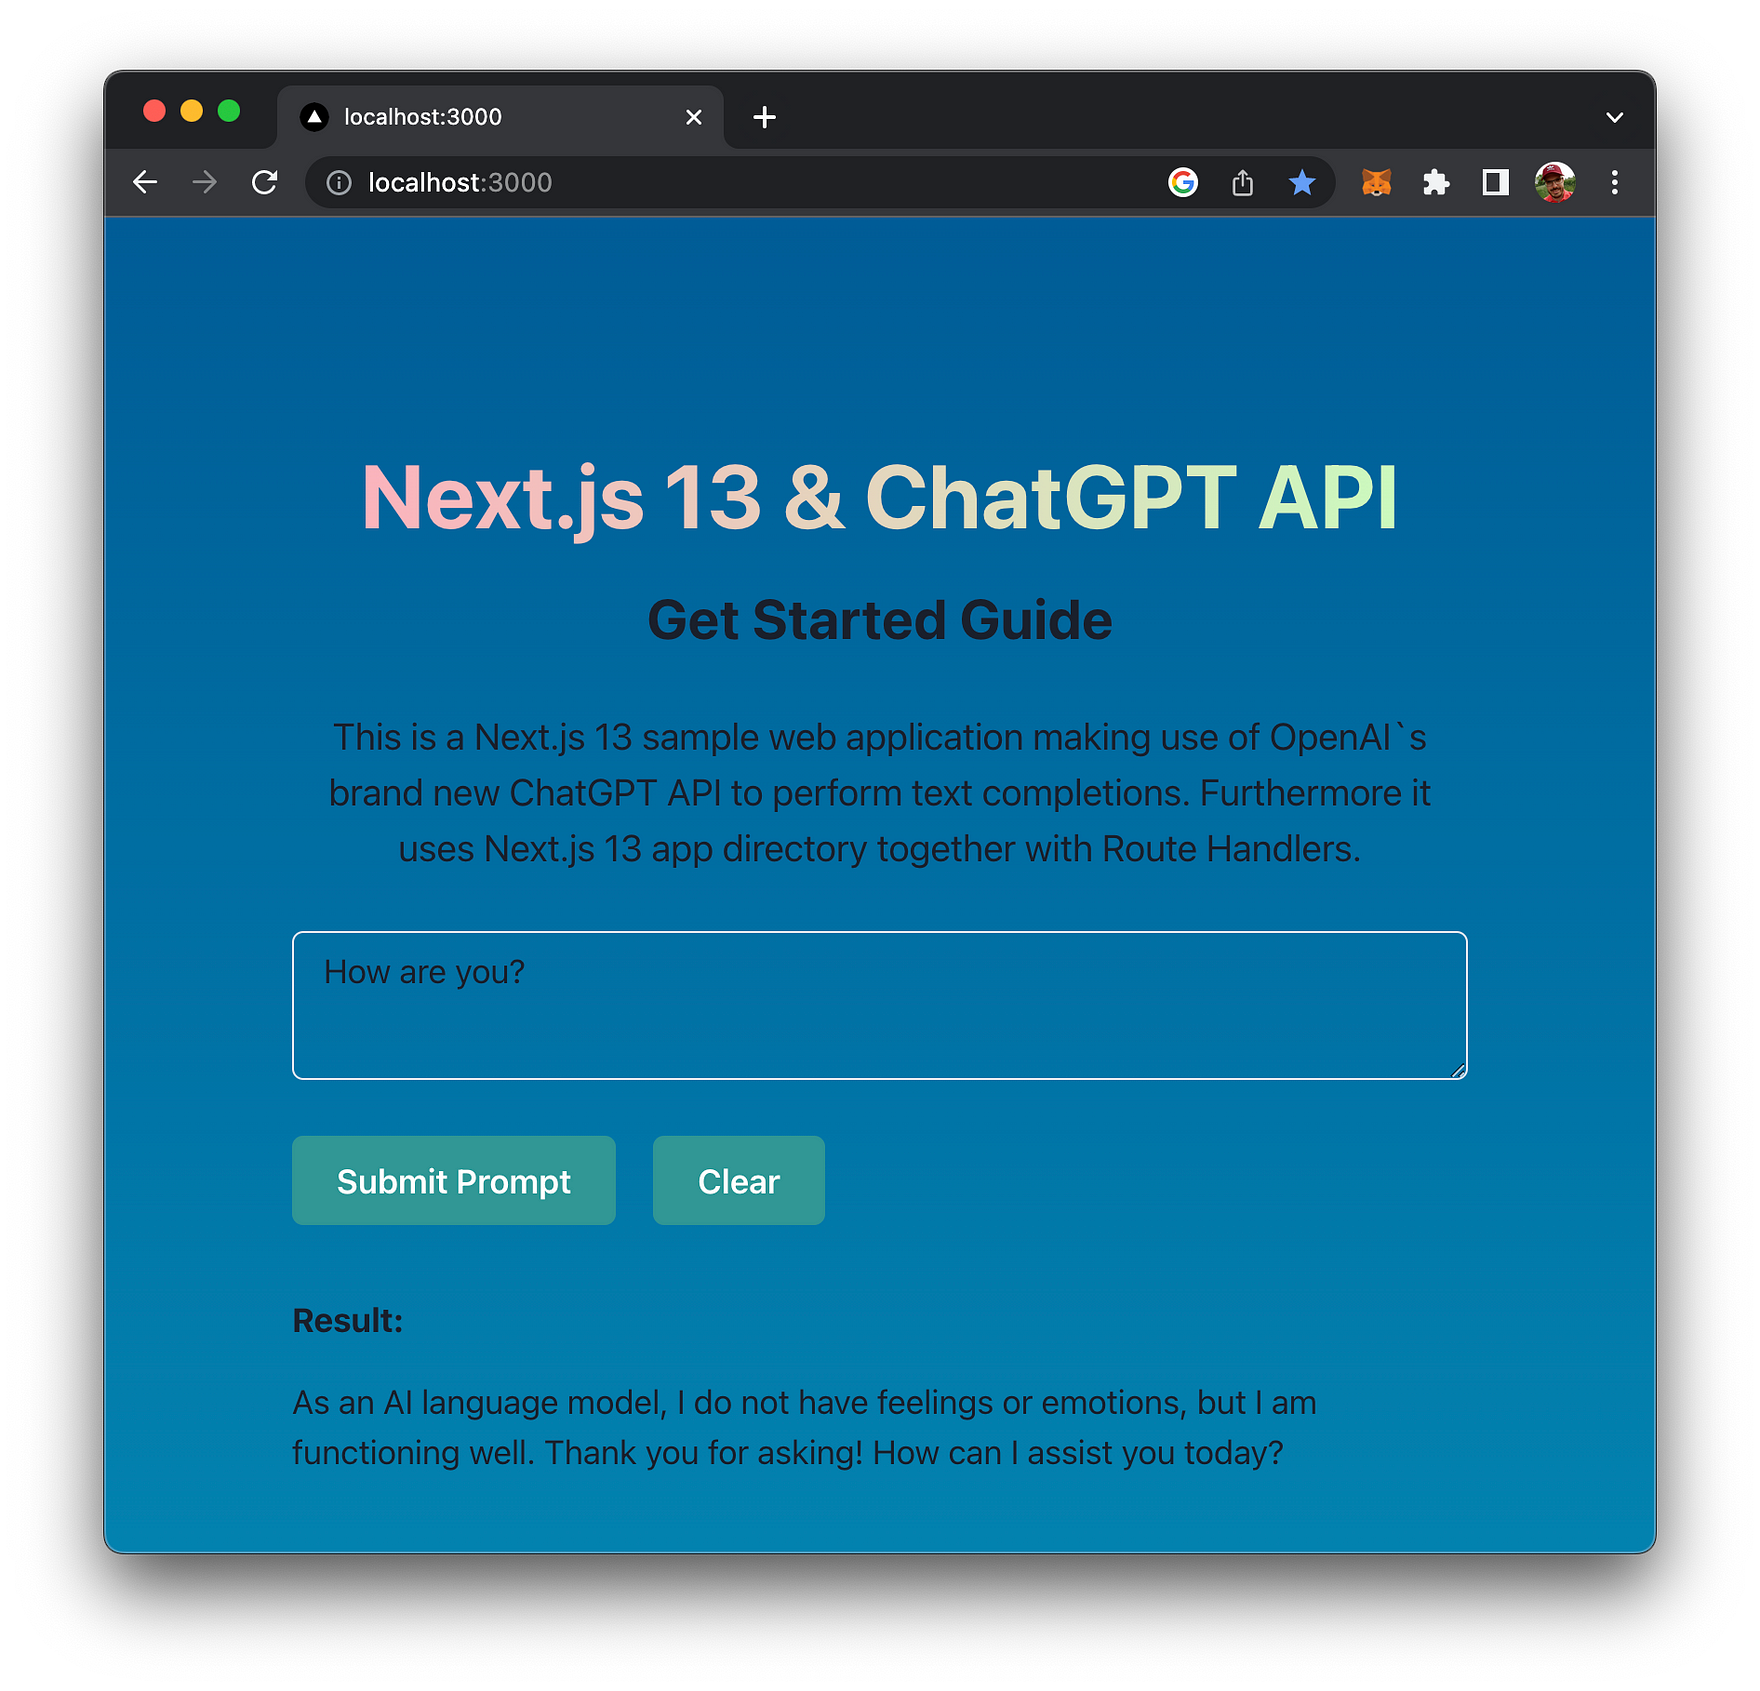
The text input field is used to input your request to ChatGPT's API. The request is submitted by clicking on button "Submit Prompt". Once the answer from the API is available the Result area with the text response becomes visible.
Congratulation, your first Next.js 13 web application is successfully making use of OpenAI new ChatGPT API.
Conclusion
OpenAI's ChatGPT API is a game-changing technology that can help developers create more human-like and engaging chatbots. By integrating this powerful API with Next.js, developers can unlock new possibilities for conversational AI, enabling their applications to respond contextually and intelligently to user input.
In this guide, we've explored the key features of the ChatGPT API and provided step-by-step instructions for integrating it with Next.js. We've also discussed best practices and tips for using this technology to create more effective AI-powered web applications.
We hope this guide has been informative and useful to you, and we encourage you to continue exploring the potential of AI in your own development work. Thank you for reading, and happy coding!